Are you looking to streamline your lead generation process and maximize engagement? With INBOXAutomation, creating a lead generation automation template has never been easier. Our platform offers a range of features, including a reply tracking feature with the STMP protocol, ensuring you stay on top of your subscriber interactions. Let’s walk through the steps to create your automation template:
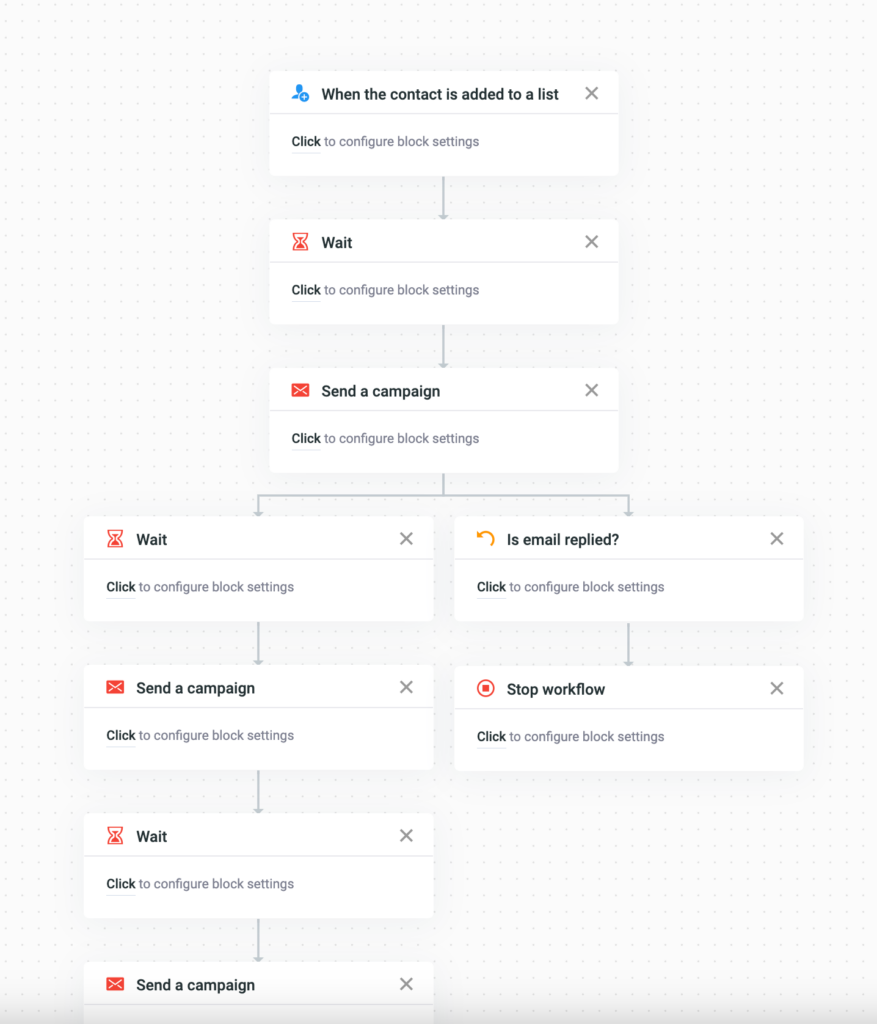
Step 1: Triggered Emails Start by selecting the trigger “When a contact is added to a list” and choose the specific contact list that you want to target for your demo invitation. This trigger will initiate the automation process.
Step 2: Waiting Period To control the timing of your follow-up emails, create a pause using the “Wait” action. Determine the appropriate waiting period between each email to ensure optimal engagement.
Step 3: Send the Initial Invitation Utilize the “Send a Campaign” action to send out the first demo invitation to your selected contact list. Craft a compelling and personalized message to capture their interest and encourage attendance.
Step 4: Cooldown Period Allow some breathing room between emails by adding another “Wait” action. Set a cooldown period of 3-5 days to prevent overwhelming your subscribers with too many messages in a short span of time.
Step 5: Follow-up Emails Keep the momentum going by sending additional campaigns as follow-ups. These emails should nurture interest, provide valuable information, and motivate subscribers to attend the demo. Customize the content based on your goals and the specific needs of your target audience.
Step 6: Repeat and Customize To create an email series scenario that aligns with your goals, repeat the above actions as necessary. Customize the messaging and intervals to fit your desired timeline and engagement strategy.
With INBOXAutomation, you can simplify the process of inviting subscribers to your demo. By automating your invitations, you can increase engagement, save time, and deliver successful demo experiences. Start leveraging the power of automation today and watch your lead generation efforts thrive.